Tuning skis and snowboards
Prices:
Waxing with or without edge tuning of skis is $35 and snowboards $45
HAND TUNING SKIS
Before any machine or hand tuning work is done on your new skis, obtain the factory edge bevel settings, also take notice of how detuned (dulled off) the edges may be at the tip and tail, although most modern skis no longer need detuning.
The factory determines what angles work best for each model of ski, some models and brands of ski will notice quite a loss in performance if set to a different edge bevel.
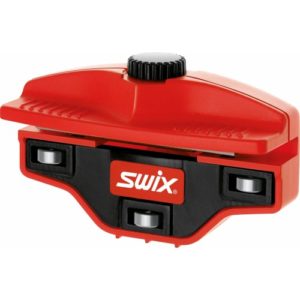
An adjustable file guide will allow you to measure these angles, see below for details.
REQUIRED EQUIPMENT
A stone grinder will do most of the work if they are in a really bad way, but a much better finish is achieved if the ski is finished off by hand with some basic tools, these tools will also keep the stone ground skis in top condition.
There is no correct way of getting the base of your skis flat by hand if they are concave or convex, if the base is not flat, you may want to get them stone ground on a stone grinder. I do not recommend getting unused skis stone ground prior to use, even if they are concave, some modern skis, perform well with a small amount of concave shape in the base.
Toko make some good tuning tools as do Swix, SVST, Star, Briko, Snoli and many others, I have found for edge sharpening and bevelling Swix Phantom is best for me, the instructions I give below will not work if you do not use a 200mm chrome file and file guides.
THE TOOLS THAT I FEEL YOU NEED ARE:

1. A device for holding your skis while you work on them, there are several types around, some hold the ski stationary by putting a dummy boot sole into the bindings and have end supports to hold the ends stable, others models hold the skis in a vice with soft sides and also have small vices as end supports, often some blocks of wood screwed to a bench with a strip of soft rubber attached to the top will hold the skis or board secure enough for hand tuning.
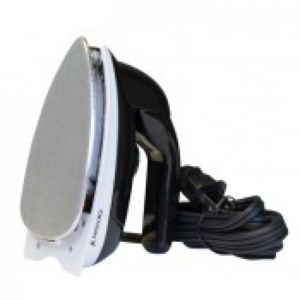
2. A waxing iron, but an electric clothes iron will do just as well in the hands of a good operator (preferably not a steam iron) make sure the base is flat as a lot of clothes irons aren’t. You will not be able to use the iron on clothes afterwards.

3. A file preferably a chrome file as these will last longer, as some ski edges are as hard as non chrome files, the file should be a mill file, and I recommend a 200mm chrome file as it fits into the base file guide for base bevelling.

4. A diamond file or better still 2 diamond files one extra coarse for removing file marks and burrs on the edges, and a medium diamond file for polishing the edges.
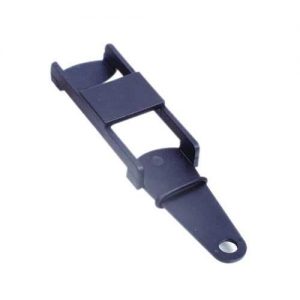
5. Swix Phantom file guide for side edge bevelling and Kunzmann base file guide set for setting the base bevel.

6. A structuring brush, the Toko horsehair one is very good, but there are other brands around just as good.
7. Base cleaner, citrus base cleaner is safe to work with and does a good job, we buy ours from the local supermarket. Some people will tell you not to use base cleaners such as Citro clean, and technically they are correct, it is better to use a basic hotwax and scrape to clean your bases if every second counts, yes base cleaners do dry out your base, that is what cleaners are supposed to do, when you hot wax them again, they are no longer dried out. You will also need a clean soft cotton cloth.
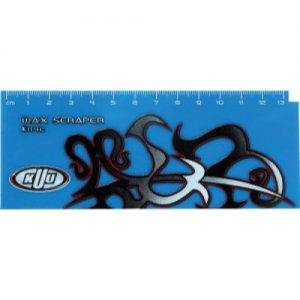
8. PLASTIC scraper, for wax removal. Never use a metal scraper on the base as it will remove the base structure and also make the base concave (railed).
9. Gloves so you don’t cut your hands while working with sharp edges.
You will need some wax to suit the conditions and depending on how fast you want to go, some of them are expensive. I do not suggest hand p texing your skis as p tex candles are too soft for modern skis and should only be used as a temporary fix until you can get the damaged skis into a shop, to have them base welded or base patched, using p tex candles makes the base weld bond weaker and can discolour the base permanently, Toko repair powder used correctly will do a much better repair job, and if you have a waxing iron it is very simple to use.
PROCEDURE
Base repairs using repair powder
For as long as I can remember home ski tuners have been using ptex candles to fix scratches in their skis. Well at last something better has arrived. Toko have developed a powder called simply ‘Repair Powder’ it comes in black or transparent only and is so easy to use. The finished repair is also a much harder material than ptex candles, and is similar to the original sintered base material. Just sprinkle enough powder into the scratch or gouge in the base to fill it, cover the base and powder with the Mylar film that comes with the powder, and heat with your waxing iron for around 20 seconds. IMPORTANT: the waxing iron must not exceed 140 degrees C, or the base will delaminate. Most waxing irons will not exceed this temperature but clothes irons will. If your iron smokes when wax is applied it is too hot. Do not remove the Mylar film until the repair is back to room temperature, then scrape of any excess repair material and hot wax the base, or have a structure placed on the base prior to waxing.
Edge tuning and hot waxing
Retain the ski binding brakes with some rubber strips a motorcycle tube cut into 20mm wide strips is ideal, or better still remove them as most bindings allow for that without changing the binding settings. If you are unsure email me and i can explain which is better for your bindings.
At this stage you should clean the base and side edges of the skis and remove any old wax and dirt with citrus base cleaner. If you have got a thick coating of storage wax on the base, this will have to be reheated with the waxing iron and scraped off with a plastic scraper while the wax is soft and warm, this includes the edges as you don’t want wax on your edging tools. Follow the waxing instructions set out later in this tuning guide to remove the storage wax. If your skis have been used since being waxed last then a clean cloth dampened with citrus cleaner should be enough as you will have scraped all the wax of after waxing them correctly.
DETERMINING EDGE BEVEL ANGLES
Side edge bevel
A lot of modern skis are now set to 2° and 3° at the factory, you need to discover the factory setting before any work is done to the new skis, to ensure they will perform as good as the day you got them. With a black texta, colour in a strip of the side edge for about 100mm and when dry, using the diamond file in the guide set at 2° carefully run it along the area of coloured edge just lightly until you can see where the diamond file is touching the edge, for this procedure i do not put the ski in the vice but hold it in my hands. If the side edge bevel is 2° then the black texta will be removed from the edge. If the black texta was removed only from the edge nearest the base then the angle is greater than 2°, colour in another section and repeat the procedure for 3° for most Austrian made skis and 2° on skis such as French made and K2. Almost all modern skis will be between 2° and 4° side edge bevel, and 0.5° to 1° base edge bevel, in the past it was thought you had to have a base and side bevel that was the same angle, but not any more.
Restrain the skis in the vice or on the rubber coated wooden blocks so you can work on the side edge from tip to tail. Now that you have worked out the side edge angle, using the coarse diamond file in the file guide set at the correct angle, remove any burrs and all rust from the edges. Never use a hand held stone, to remove burrs, as this will round off the edges to all sorts of strange angles. If the skis are not badly dulled off by rocks you will not need to file them with the chrome file, the coarse diamond file used regularly will keep them sharp and will not remove as much edge material as the chrome file. If you have dulled them off on the rocks or they haven’t been sharpened for a while, then you will have to now use the chrome file, after removing all burrs and rust with the coarse diamond file, place the chrome file into the Toko precision file guide still set at the correct angle and file the side edge in the direction from tip to tail until you feel the edge is sharp enough, do both edges of both skis, you do not need to sharpen beyond the widest points of the skis at either end but deburring should be done the full length of the ski.
Base edge bevel
Now that the side edges are sharp it is time to check the base edge bevel, first lightly run a diamond file over the base edge in case there are burrs, be careful not to tilt the file and round over the edges, again with the black texta, colour in a section of base edge and using the 200mm chrome file in the 1° Kunzmann base file guide, see if the base bevel is actually 1°. On some new skis it may not be, but that would be rare. If the base bevel is 1° or you are confident that the bevel is correct, DO NOT file the base edge, if you do, you will then need to have some plastic base material removed by a stone grinder to retain good edge hold, if you do plan to get the bases stone ground after you have finished the edges, to get the right base pattern for the current snow conditions, you will have to file the base bevel, into the plastic around 2 to 3mm, also if you do create a bevel on the base edge with the chrome file then you will need to polish it as per instructions below for side edge sharpening.

Once the chrome file has the edges sharp enough it is now time to remove all file marks left in the edges with the coarse diamond stone in the file guide while still set at the correct angle, when this is complete swap over the coarse diamond file for the fine diamond file and polish the edges. Not every one will want polished edges or even care about file marks in the edges, but if you are after speed it is worth spending the time.
WAXING
Waxing is a science that is constantly changing, and almost everyone has a different opinion on how to wax correctly. I am not going into great detail on how the national team members have their skis waxed, but will attempt to give you some simple instructions for waxing your skis at home. Some spray on and rub on waxes are better than no wax at all, but a hot hand ironed wax is still regarded as the best way to wax skis. Hydrocarbon waxes are priced well and unless you are racing are all you need. Different waxes are used depending on variables such as humidity, snow granulation, temperature and the type of snow friction.

If you are using a temperature adjustable waxing iron, the temperature is correct when set at around 120° C to 150° C. Basically if the iron is smoking when a little wax is covering the base it is considered too hot. An iron that is set too high will not only destroy the properties of the wax, but also may damage the base of the skis.
With the skis at room temperature and with a clean dry base, the waxing iron set to the correct temperature, (if it is adjustable) place the skis in the vice with the base facing upwards, hold the block of hydrocarbon wax against the base of the hot iron and move along over the top of the ski so that you put about 1 drip every 50mm, this will not be quite enough but it is far better to put less wax on at first and iron that in, then you will then be able to judge how much more is needed. Even if you intend using hi performance waxes you need to start with a hydrocarbon wax first.

If you are using this hydrocarbon wax to clean the base, scrape back with the plastic scraper while the wax is still warm and soft, these steps can be repeated until you are satisfied the base is clean. When the base is clean don’t scrape the last lot of wax off until it has cooled to room temperature.
Wax absorption verses time. In the first 3 to 4 minutes of applying the wax, with a hot iron set to 120° C, around 15 milligrams per square centimetre is absorbed. An iron that is set to 100° C will only absorb around 4 milligrams per square centimetre. After another 3 to 4 minutes another milligram will be absorbed, but after that, then you are just wasting time.
If you are planning on a faster base using higher performance waxes, reheat the iron and apply your choice of hydrocarbon wax.
DO NOT BREATHE THE FUMES OF WAXES OR USE IN A CONFINED SPACE.
Wait until cool and scrape back with the plastic scraper.
Brush any remaining wax off the base with the horsehair structure brush, or if you own a nylon brush you could use that, exposing the base structure.
Remove any wax that dripped over the sides with a plastic scraper.
Put the brakes back onto the bindings if you removed them, and place some ski ties around the finished ski with a soft material in between the contact points of the skis, an old pair of ski socks is ideal for this, just slip one sock over one ski tip and the other sock over one ski tail.
SNOWBOARD TUNING
For those wanting to tune your board at home, here are a few tips that should help, with compliments of Burton snowboards and myself. Your board should be stone ground first to ensure it is flat, all repair work completed, and a structure on the base, a base edge bevel should also be done if a stone grinding machine was used.
Always work from the tip to the tail when tuning snowboards.
1. Using a diamond stone, gummy stone or ceramic stone remove all burrs and rust from the edges. A burr on an edge is harder than most files and will damage your file if this is not done first. Chrome files are much harder than a normal file you would buy from a hardware shop, and are worth the extra expense. The Toko 200mm chrome file can also be used with a 1 degree Kunzmann base file guide for base edge bevelling by hand, and will also fit into a Swix Phantom precision file guide for side edge bevelling, both are tools i use to hand tune all skis and snowboards in my workshop.
2. Sharpen the side edge using a mill file in a file guide set to 1 degree for most boards.
3. Hone the edge with a Coarse diamond stone to remove the file marks, still using the Swix Phantom file guide set at the correct angle.

4. Polish the edges with a medium diamond stone in the file guide set at the correct angle.
Diamond files are best used when wet, so keep a container of water handy and keep the diamond file wet.
5. Now if using a cambered board, without tip and tail rocker, we have to de-tune the contact points of the board with Toko Fibretex. The contact points are the widest part of the snowboard at either end, if these are not de-tuned you may get thrown onto your head quite often and the board is very hard to control. The amount of de-tuning varies from board to board and brand-to-brand but generally 50mm either side of the contact points at the tail and 70mm at the tip is enough, for the rockered base boards detuning is not required for most riders.
6. Clean the base with a soft clean cotton cloth. If there is dirt in the base, try hot waxing with a cheap wax even a candle, and then scraping right back while the wax is still warm and soft, you may even need to use a citrus base cleaner if the base is very dirty.
7. CAUTION is required here. Using an iron on a LOW setting, drip a little universal wax the base and with the iron CONSTANTLY MOVING, iron the wax into the base of the board, if the iron is smoking then it is too hot. The wax is absorbed into the pores of the base due to heat, the longer period of time you apply heat to the base the more wax will be absorbed up to a certain point, about 6 minutes maximum for any one area. You can destroy the properties of a good wax by overheating the wax and you can destroy the base of a board by overheating the base. Generally the wax should be liquid well after the iron has passed if the base is warm enough, you get the base warm by continually moving the iron over it for a long period of time usually around 5 minutes for the whole board, when the base is warm enough you should be able to feel some warmth from the binding side of the board. Allow the board to cool to room temperature and scrape all the wax you can see right off the base using a PLASTIC scraper. For most riders this enough on waxing and you can go to step 8. For those wanting a little more speed and glide reheat the iron and drip some Toko man made snow wax on the edge area as man made snow wax lasts longer in icy conditions and man made snow. As you don’t spend much time riding your board on its flat base the centre of the board is not quite as important as the edge area. Iron the wax in well as before, and when cool scrape back.

8. Use a structuring brush to remove any excess wax still on the board and expose the base structure.
9. For on the mountain quick wax jobs, some of the spray and wipe on waxes are excellent such as Swix F4.
A major cause of rust on edges is due to storage of boards in their bags, it is best to use you bag only while transporting your board.
Ptex candles that you can use at home are only meant for temporary repairs for any long-term base repairs a shop uses a base welder which is much harder material and lasts longer.
For more information email Paul Oberin at [email protected]